Fading your image is a simple way to make it stand out and attract attention. There are multiple ways you can do this. Here are a few ways to fade an image in Photoshop. It’s actually very easy to do!
During the prototyping process, it’s often the case that we’ll want to test different images or text content on our page. Selectively applying effects to your graphic can be a great way to test your design and message. Here we’ll cover how to fade an image in photoshop, so you can create a powerful visual that improves comprehension and displays your information in an easy-to-understand way.
Fading an image in Photoshop can be a great design technique to use. However, it isn’t as simple as you think to create the best fade image effect. Here’s our guide to fading images in Photoshop quickly and easily.
This article will show you how to fade an image in Photoshop. Fading a picture gives it a classic look and can set a softer mood. You will want to fade an image when your subject is moving far away from the camera. Usually, you can do this with a gradient map adjustment layer and some masking. – https://www.photoshopessentials.com/photo-effects/fade-an-image-into-any-background-color-with-photoshop/
The “fade” command in Photoshop enables you to fade an image or layer by adding or subtracting pixels, which can have various effects on the image.
Targeting the area you want to change
Fade Image – In this lesson, you will learn how to fade an image in Photoshop, including how to use the Fade command and the Gradient Tool.
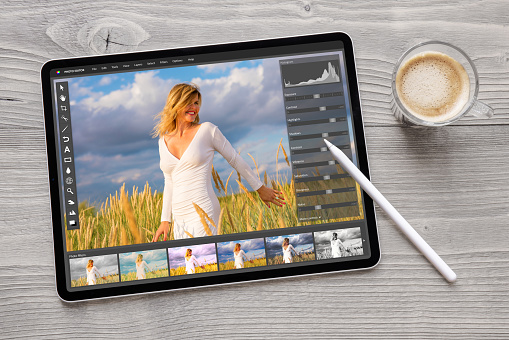
Step 1: Open Your File
Open your file and make sure that it is selected by clicking on it once. If your file does not already have a background layer, create one by going to Layer > New > Layer via Copy (or Command + J on Mac).
Step 2: Choose Your Settings
Choose a color for your background layer by going to Edit > Color Set (or Shift + Ctrl + B on Mac). In this example, we chose white as our background color.
Step 3: Select Your Fading Point
Select a point near where you want the fade to begin as your starting point. In this example, we chose the top left corner for our starting point. The end result will be similar if we had chosen the bottom right corner instead—the only difference would be where each line ends up after fading is complete!
Creating a new layer
Fading an image in Photoshop is simple. In this tutorial, we’ll go over how to fade an image into another image or color using the Fade command.
Open your images in Photoshop. You’ll want to make sure they’re both open so that you can see where they overlap.
Select the layer with your original image on it by clicking on that layer in the Layers panel.
Click the “Add Layer Mask” button at the bottom of the Layers panel. This will add a layer mask to this layer, which you can use to fade out parts of it.
Click on the black circle at the top of this new mask and drag it to where you want it — usually on top of the other image. The black will hide parts of your image from showing up where it overlaps with other layers below it while allowing parts below that overlap area to show through as well as anything else below them (like text).
Selecting the new layer
Selecting a new layer is important in Photoshop because it allows you to create a new layer that can be manipulated without affecting the pixels of any other layers below it. For example, if you wanted to make a change to your images—such as increasing or decreasing the brightness or contrast—you would select a new layer, which would allow you to make changes without affecting the original pixels underneath.
The first step in the process of fading an image in Photoshop is to duplicate the layer. To do this, right-click on the layer you want to fade and select “Duplicate Layer.” This will create a new layer that is identical to the original one.
Next, you’ll want to use opacity as your tool for creating a gradual fade. Go to “Layer” and select “Layer Style.” Then click on “Blending Options” next to “Normal” under Opacity. You should see a window pop up with different options for setting an opacity percentage. Click on the little arrow next to “Opacity” and drag it down until it reaches 0%. Then close out of this window using the X in the upper left corner.
Now that you have your new layer created, go back to your original layer and click on “Image” then “Adjustments” then “Levels.” This will open up another screen that allows you to adjust how dark or light each color is within your image. Move each slider until all colors are equalized throughout; then click OK when finished.
Selecting the type of change you want to make using the “Layer” menu
The “Layer” menu is where you can find all the tools you need to make changes to your image. There are three types of changes:
-Fade image in photoshop – This type of change allows you to make it so that the darker areas of your image become lighter and vice versa, while still maintaining the same hue or color. You can use this tool to make it look like someone is looking into a window, or if you have a picture of something in front of a window, you could use this tool to make it seem like there are people standing inside looking out.
-Invert image – This is the opposite of fading an image in photoshop; instead of making dark areas lighter and light areas darker, it does just the opposite by making light areas dark and dark areas light. Use this tool for images where you want to emphasize the contrast between different colors so that one stands out more than others (for example black & white photos).
-Change color balance – This allows users to adjust their images according to three different color channels: reds (R), greens (G), and blues (B). If anyone knows anything about photography or editing photos then they will know that these three colors create everything else on earth!
Adding a layer mask and adjustment layers
Adding a layer mask and adjustment layers to your image is a great way to add depth and detail to your photos. This tutorial will walk you through how to do that, but first, let’s go over some of the basics.
Layer masks are simply black-and-white images that can be applied over other layers in Photoshop. They’re especially useful for blending images together or creating more complex effects than you could with just one layer. Adjustment layers are also useful for adding color and tone to your images—but unlike layer masks, they don’t actually change the pixels in your image itself; they just adjust what colors show up on top of them. You can use adjustment layers with layer masks in Photoshop to make all sorts of interesting effects!
There are different ways of fading an image, and some tricks that can help make your adjustment more realistic.
Wrapping up, I have tried to make the process of fading an image in Photoshop as easy as possible. If you follow my guidelines, you will be able to make a beautiful faded background for your designs. Good luck and enjoy!


