Introduction
Wondering how to make a 3D print? If you’ve ever wanted to quickly and easily make your own 3D models, this is the blog post for you. With a little practice and some simple instructions, you can become a true 3D printing wizard. Let’s get started!
3D printing is a great way to create objects that are otherwise impossible to make. After all, what’s more, difficult than making a 3D object that can be held in your hand? Back in the 1990s, having machines that could do this was well beyond the reach of our imaginations, and they were still very expensive. But now they have become relatively common and within the margins of affordability. In this article, you will learn how to make 3D prints (for beginners).
Find a 3D model (3D Scan, 3D Modeling Software, Online 3D Model Archives)
If you’ve already got a 3D model, skip to the next section.
- 3D Scanning
3D scanning is the process of capturing something in 3D with the help of a specialized camera system, software, and/or hardware. The resulting digital file can then be used for printing or further processing (e.g., cleaning up imperfections). There are quite a few different ways to do this, but we’re going to focus on two easy options: hand-held scanners and turntables.
Hand-held scanners are basically optical mouse that rotates around your object while taking pictures of it from different angles at high speeds with each pass. The pictures are then stitched together by software into one 3D model that has a surprisingly good resolution! You can also use existing depth sensors like Microsoft Kinect to generate similar models automatically without having even touched your object—but this method has some limitations in terms of precision because it relies on having good lighting conditions to make sure there aren’t any shadows before using these methods 😉
Process your model (If you have a scan or model it) as a first step of how to make a 3D print
If you have a scan or model, it may not be exactly what you want. You can fix holes and errors in the model using Meshmixer (or another program). If there are unwanted parts of your model, you can remove them with Meshmixer as well. In some cases, if your scan or model has too many small details that need to print in thin layers, it will take longer to print than necessary. In this case, try combining multiple scans together into one piece so that the printer only needs to print one large part instead of many small parts!
Prepare the print settings (Material & Extrusion Settings, Layer Height, Shell/Outline Settings, Print Speed, Extruder Temperature)
Once you’ve decided on the right print settings, it’s time to start making your 3D print. First, prepare the print settings (material & extrusion settings, layer height, shell/outline settings, print speed, and extruder temperature).
The material setting is often specific to your printer so check with your machine’s manual or manufacturer’s website for instructions. The smaller the layer height (the distance between layers), the better quality of 3D print you will get. The shell thickness is how much plastic is used to make an outer shell around each layer of filament before printing a new one. This helps prevent warping during cooling after printing as well as supporting overhangs when needed during some prints.
The extrusion speed and temperature are also very important in getting good 3D prints because these affect how quickly cools down as well as maintaining accuracy in dimensions when printing large items like furniture pieces or prototypes for other uses such as design models!
Slice your model into layers (Slicing Software) as the next step in learning how to make a 3D print
Once you have your 3D model ready to print, it’s time to slice the model into layers. This will tell the printer what to do and when during the printing process. To do this, you’ll need a piece of software called Slic3r that will help you with this task. You can download Slic3r here: https://slic3r.org/download/.
- Open up Slic3r and import your 3D model file (STL). Make sure all settings are set correctly for your printer type and material choice before slicing! If not, check out our guide on how to properly configure an STL file for printing here: https://www.instructables.com/id/How-to-configure-an-STL-file/. Once everything looks good in Slic3r click “Slice”.
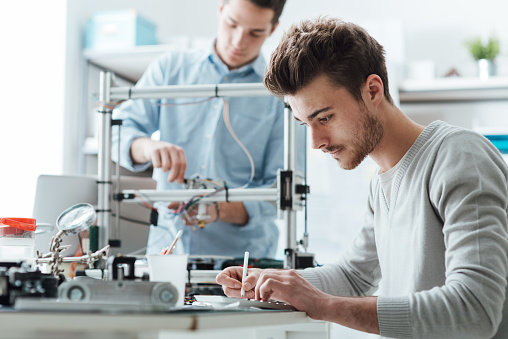
Configure 3D Printer settings (Connect to computer and set up communication software)
Configure 3D Printer settings (Connect to computer and set up communication software)
The first step in the process of making your own 3D prints is to configure your 3D printer. This involves connecting it to your computer, installing the necessary drivers, and configuring communication software so that you can use your printer.
There are many options for communication software, but we recommend either Cura or Simplify3D as they are both easy to use and compatible with most printers. You should also check that you have downloaded all of the correct drivers for your particular 3D printer model before continuing with this guide. The last thing you want is for everything to go wrong halfway through because you missed something simple!
Upload and start printing! (Export Gcode and upload to printer) – the final step to learn how to make a 3D print
- Export the Gcode
- Upload to Printer
- Hit “Send to Print” on the printer’s screen or in its desktop software. Your 3D model will start printing!
- Wait for it to finish and remove it when done.
You can often easily make 3D prints at home.
You can often easily make 3D prints at home.
There are a variety of ways in which you can make your own 3D print:
- Using a 3D printer, which is a machine that builds objects from plastic or other materials by laying down successive layers on top of each other.
- Scanning an object using a 3D scanner and then making the object into a file for printing on a computer or sending it to an online service for printing.
- Creating models in software such as CAD (computer-aided design) programs and then downloading them onto your computer so that they can be sent off to be printed.
Conclusion
Now that you’ve gotten the hang of 3D printing, it’s time to take your 3D prints to the next level. If you’re ready to make that jump, check out our article on how
to master professional-quality 3D printing. – https://www.amazon.com/Best-3D-Printers-Beginners/s?k=Best+3D+Printers+for+Beginners


