Sometimes we don’t like some unwanted things and we want to remove those objects from our pictures. It doesn’t matter if we take the pictures ourselves, someone else takes them, or we get them from somewhere. We just want to make our images look better by removing unnecessary objects.
But we make a mistake when we use bad online tools to do this. These tools can’t do a good job of sharpening the picture to look natural after taking out the unwanted objects. They make the picture look worse.
The good news is that you can easily remove objects in Photoshop.
In this tutorial, we will show you a step-by-step guideline on how to remove unwanted objects in Photoshop CC.
So, let’s get started.
How to Remove Unwanted Objects in Photoshop CC? [A Complete Guideline]
Photoshop has many amazing tools that can help you do this thing without wasting extra time. The best thing is that you can use them even if you are new to Photoshop! Here, you just need to know some tricks on how to remove objects in Photoshop CC.
We know that capturing a flawless photo is not an easy task. Often, we have to get rid of unwanted elements from the photo. Hence, Photoshop is an excellent tool for removing any object from photos.
On the other hand, Content-aware fill-in Photoshop CC is the easiest and most efficient of all methods. It fills the selection by matching the content rather than the color. It works best on any plain background.
So, keep reading till the end of this tutorial on how to remove unwanted objects in Photoshop using the lasso tool and the Content-aware fill option.
Remember this technique will work only to remove specific object from the photo. In contrast, if you need to remove the entire background you may require hand drawn clipping path service. Fotor or Clipping Mask Asia can be handy in that case.
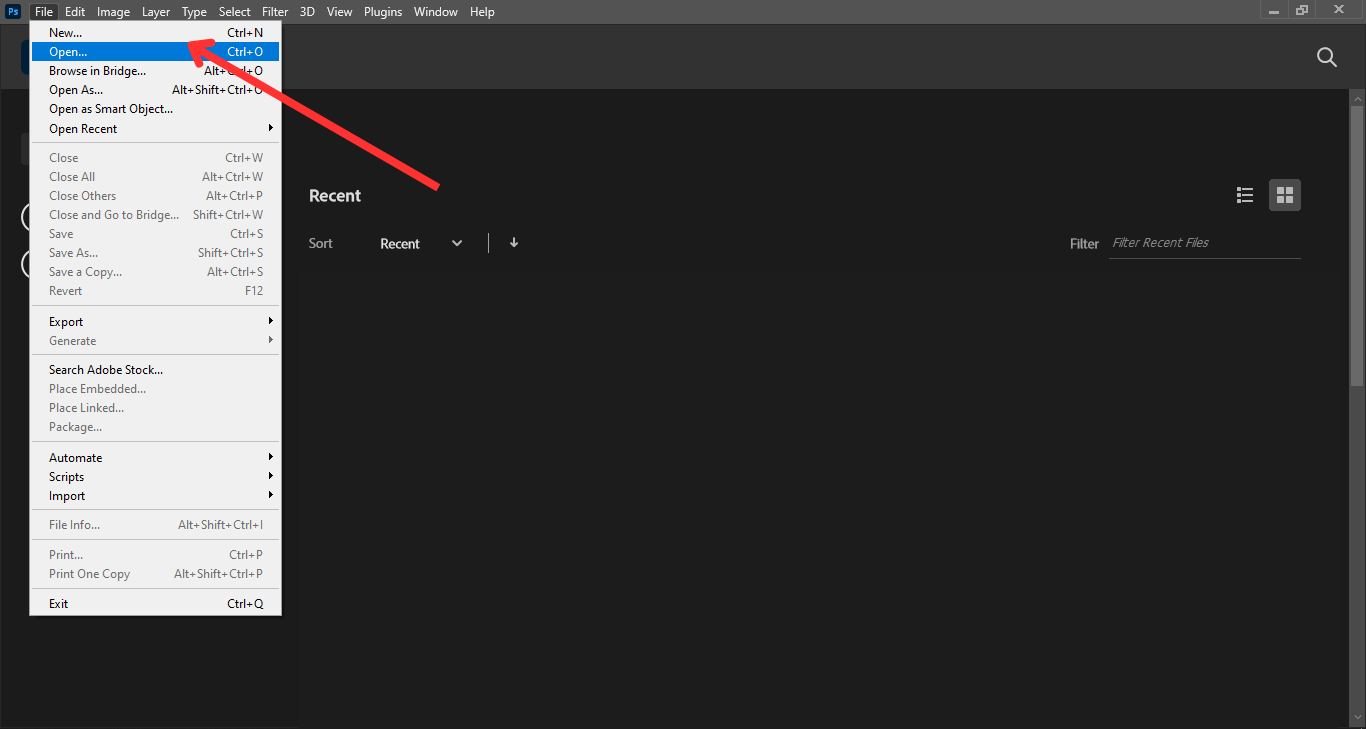
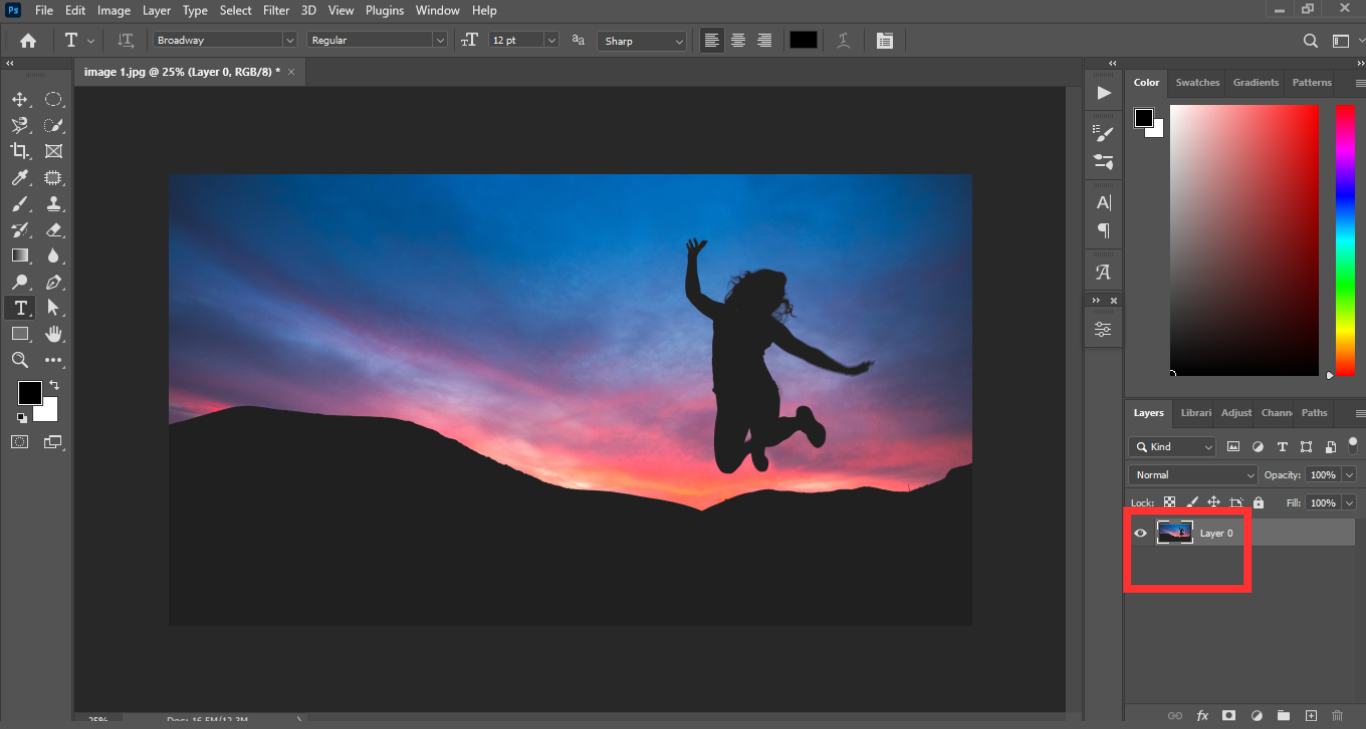
Step#1: Open Your Image file in Photoshop
To open the image file, go to the top menubar in your Photoshop application. Click on the “file” tab and choose “Open” from the drop-down menu.
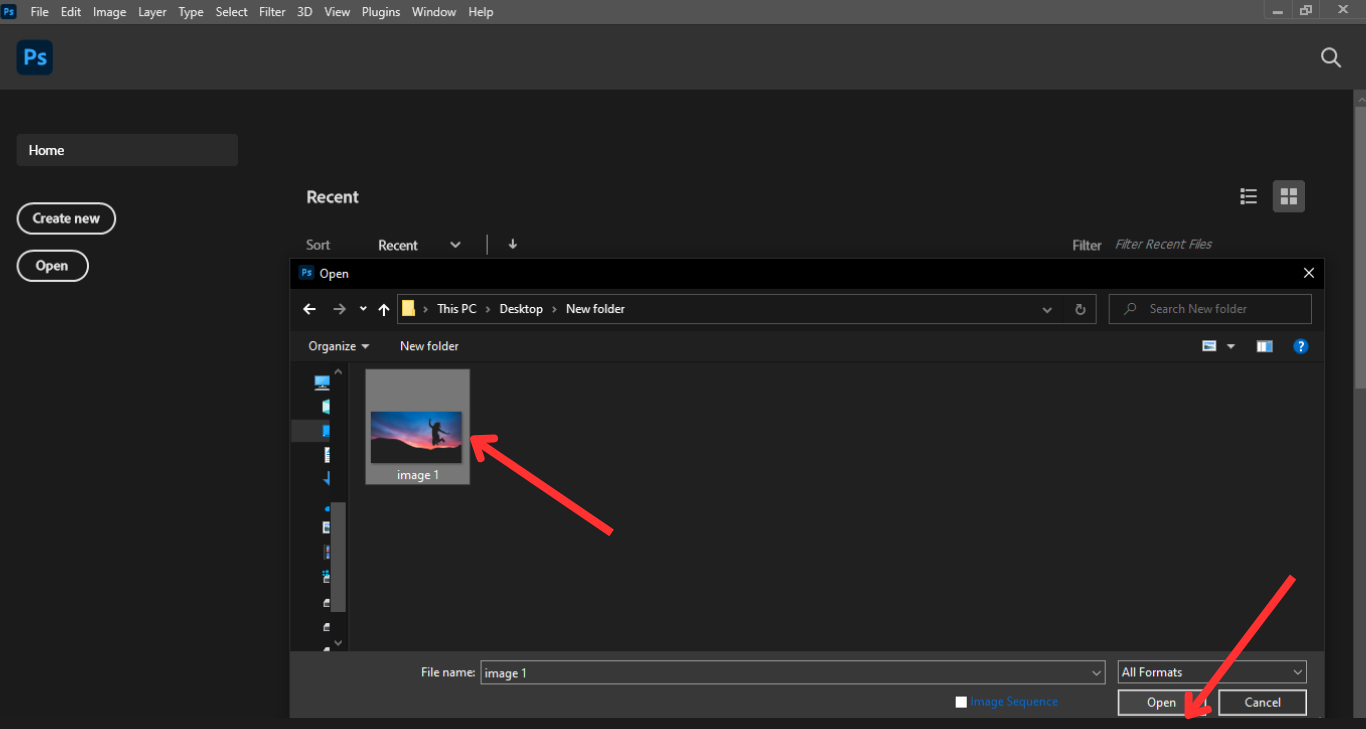
Now, choose the image file and open the picture that has the objects you want to remove.
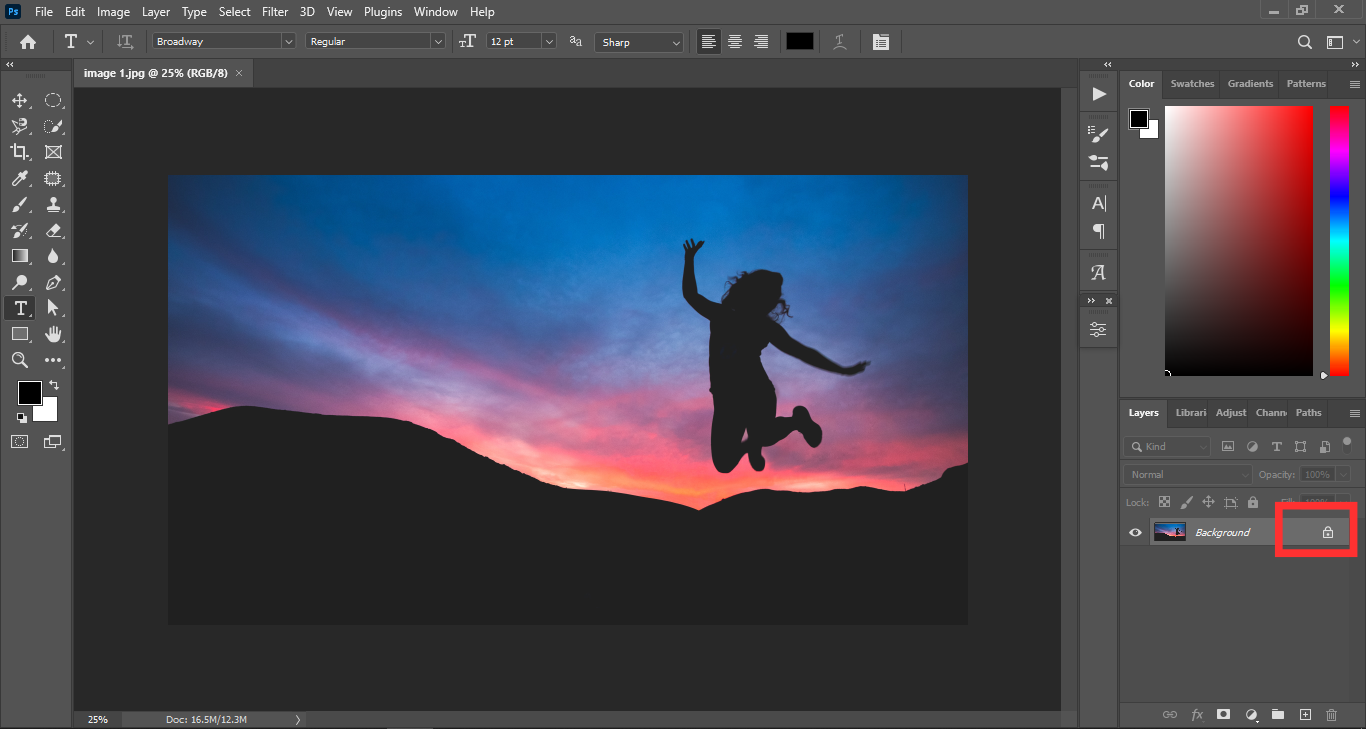
Make sure to unlock the background layer by clicking the lock icon on it. See the below images:
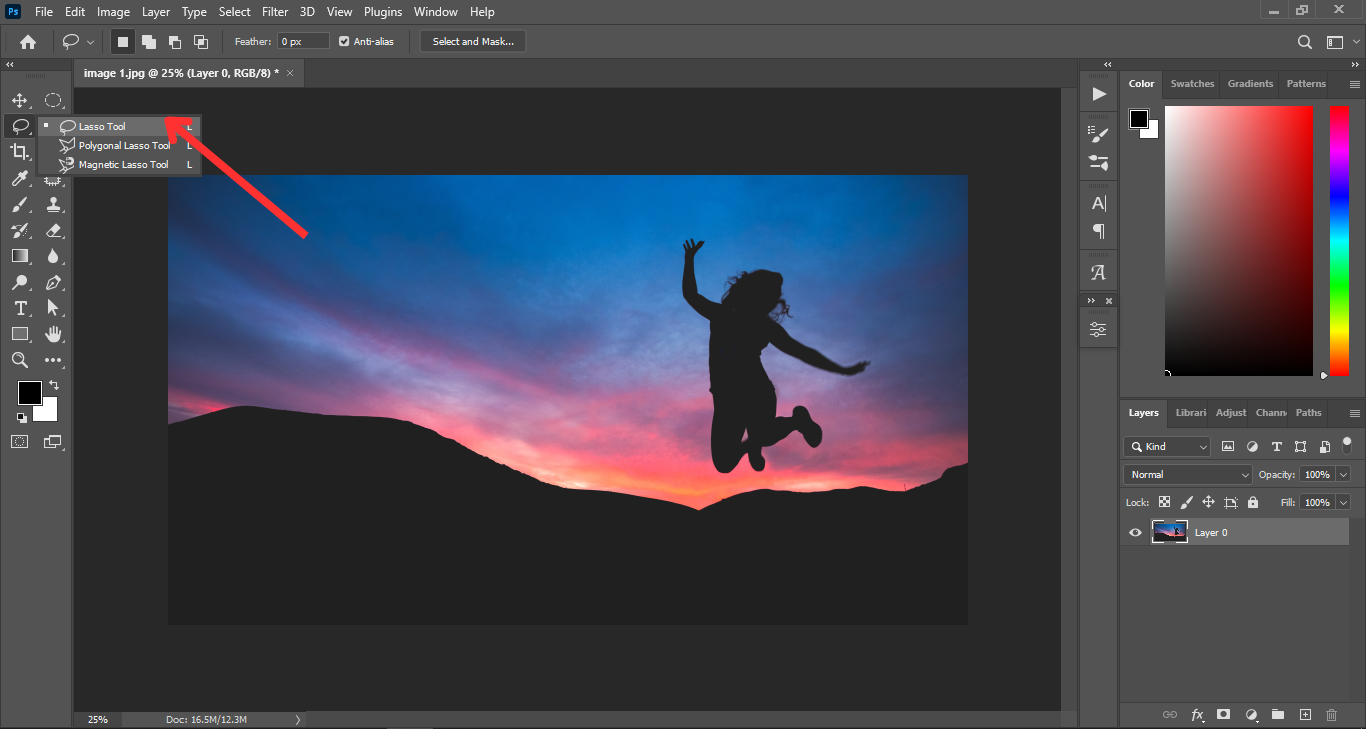
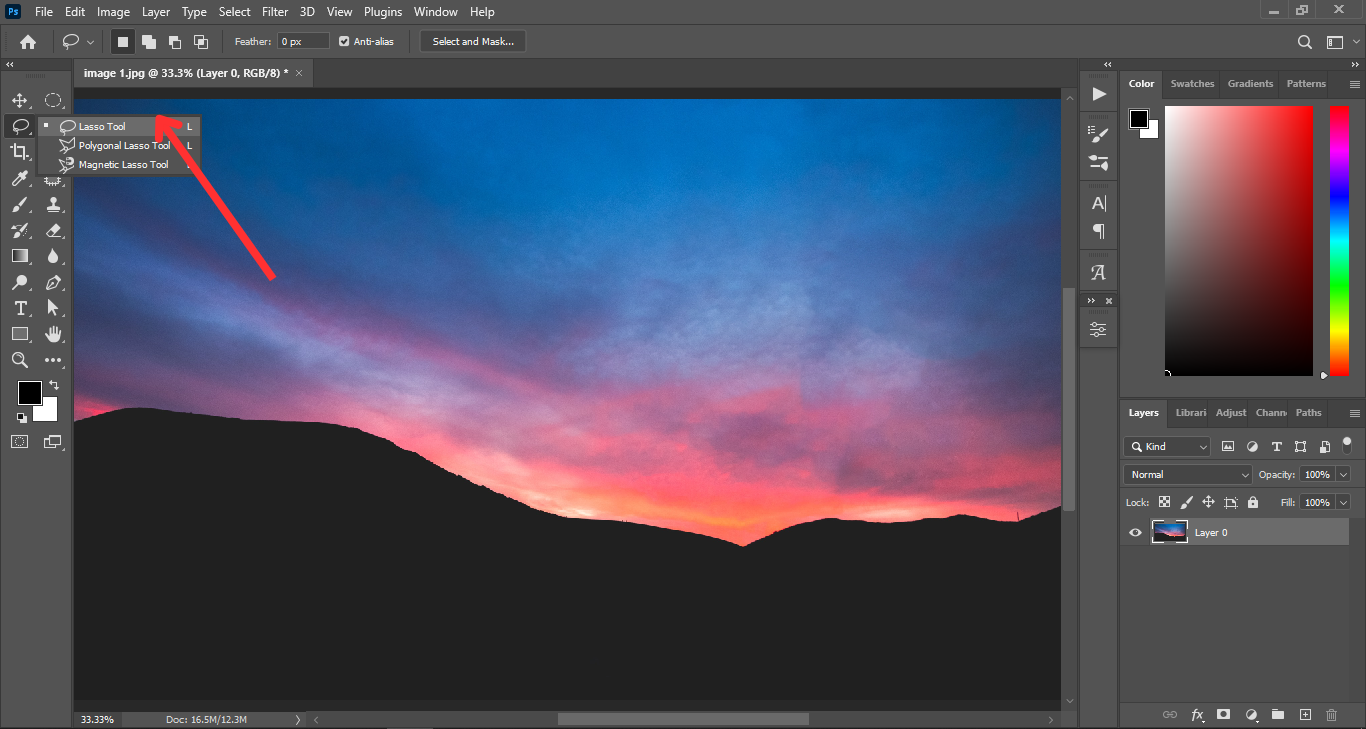
Step#2: Pick out the Lasso Tool
Next, we will use the “Lasso tool” to take out the unnecessary objects from our picture. So, go to the left side toolbar in your Photoshop interface and then choose the “Lasso tool” from the drop-down menu right away.
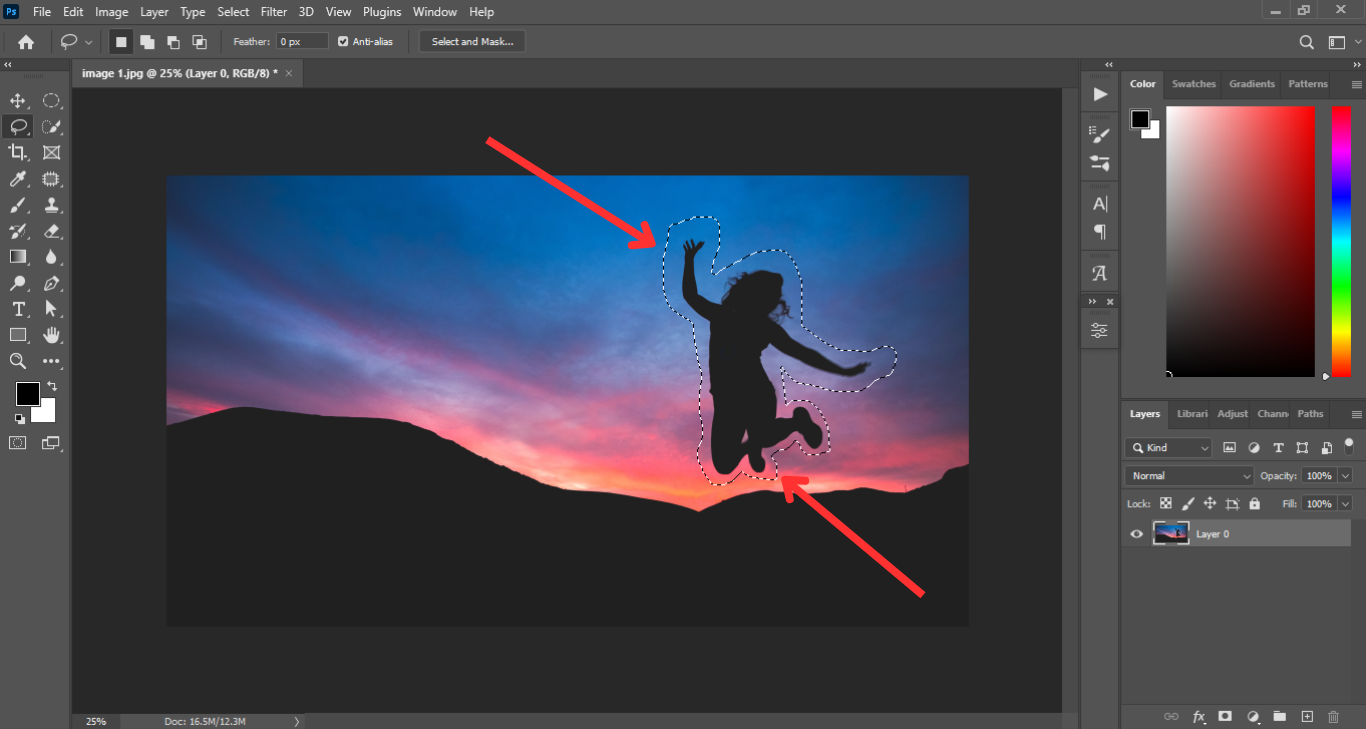
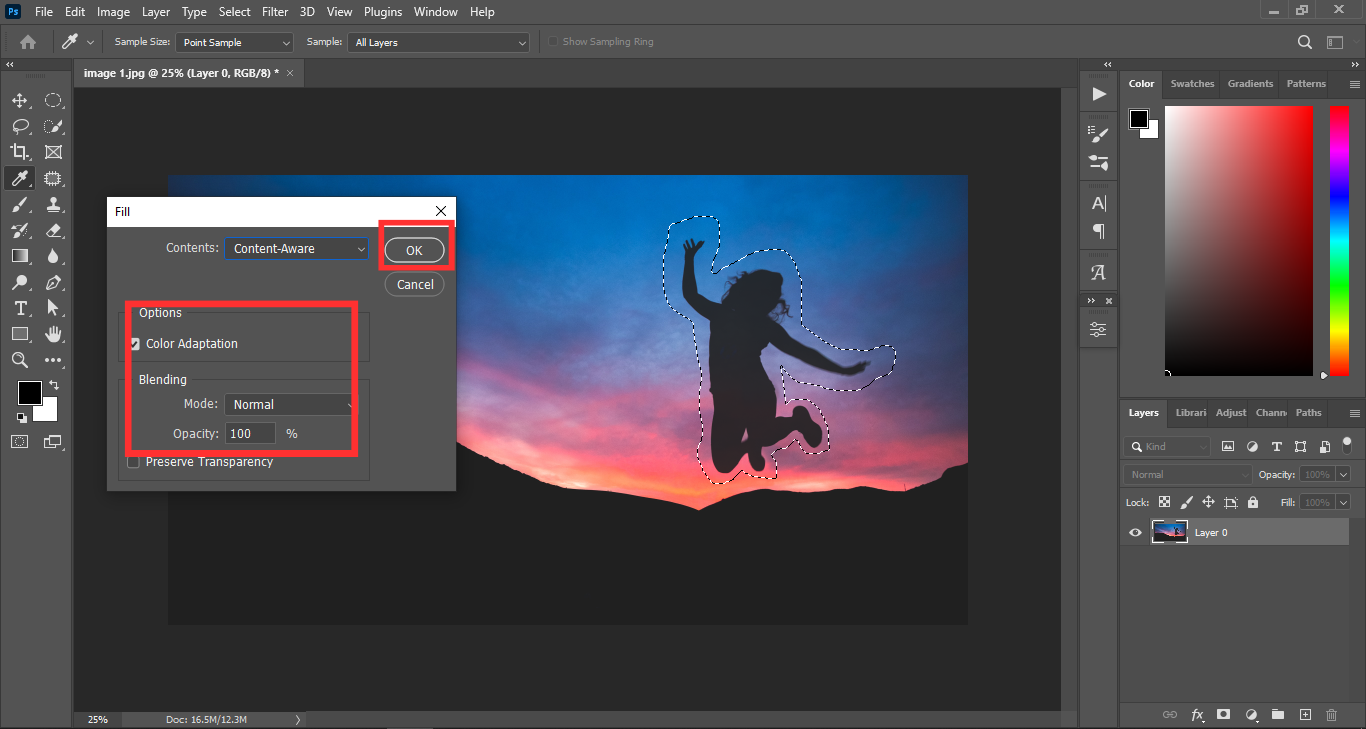
Step#3: Draw a Circle Around the Unwanted Things
Now, draw a circle around the objects that you would like to remove. Make sure to draw close to the object and include some of the area around it. Look at the below images to understand better.
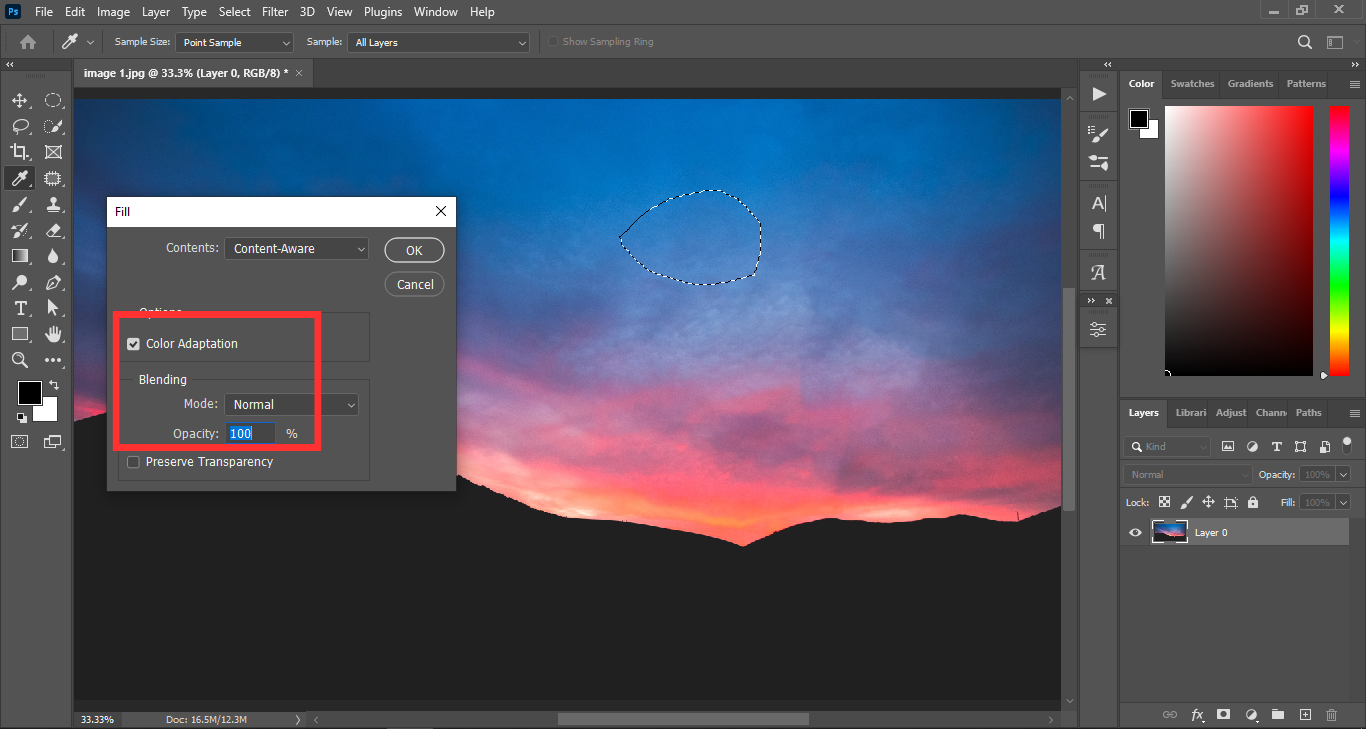
After you finish drawing, press the “Shift + F5” button together. You will get a new pop-up named “Fill”
Then select the “Content-Aware” option from the drop-down menu.
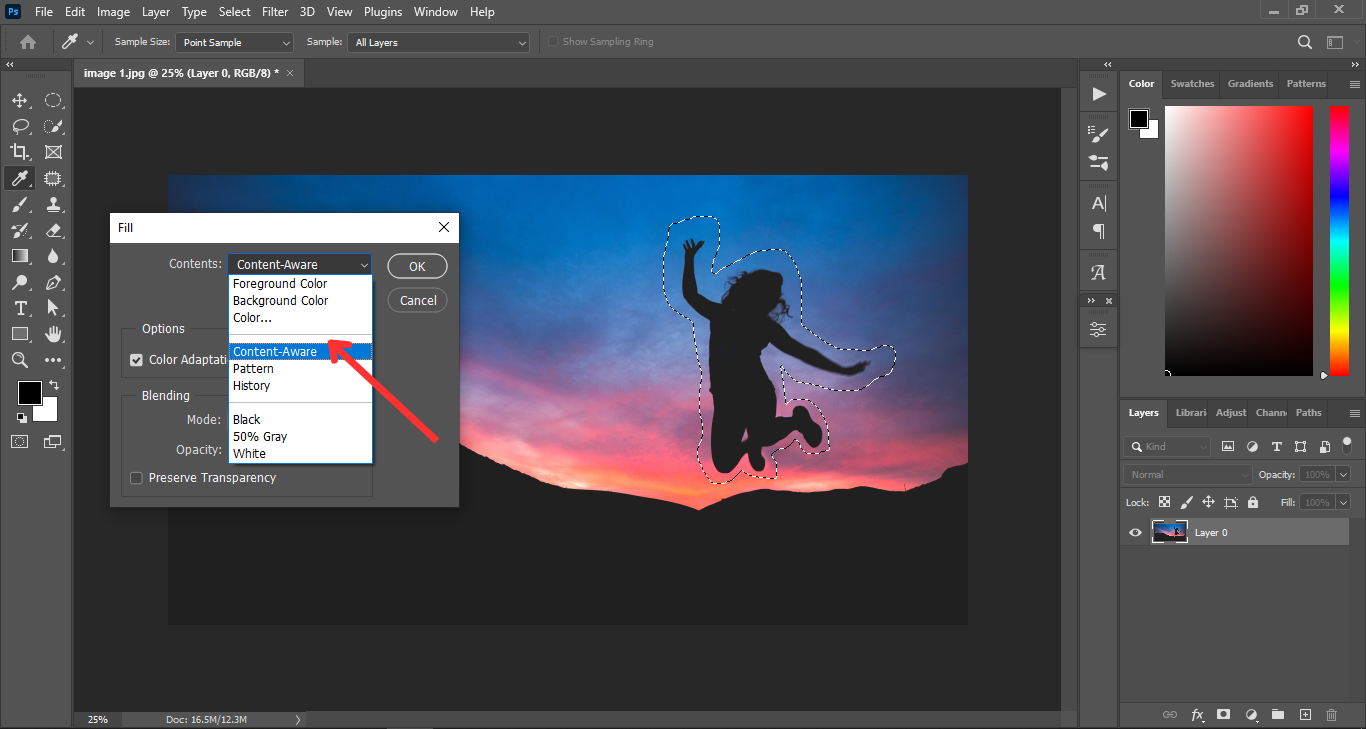
Ensure the opacity level is set to 100%. Then, click the “OK” button.
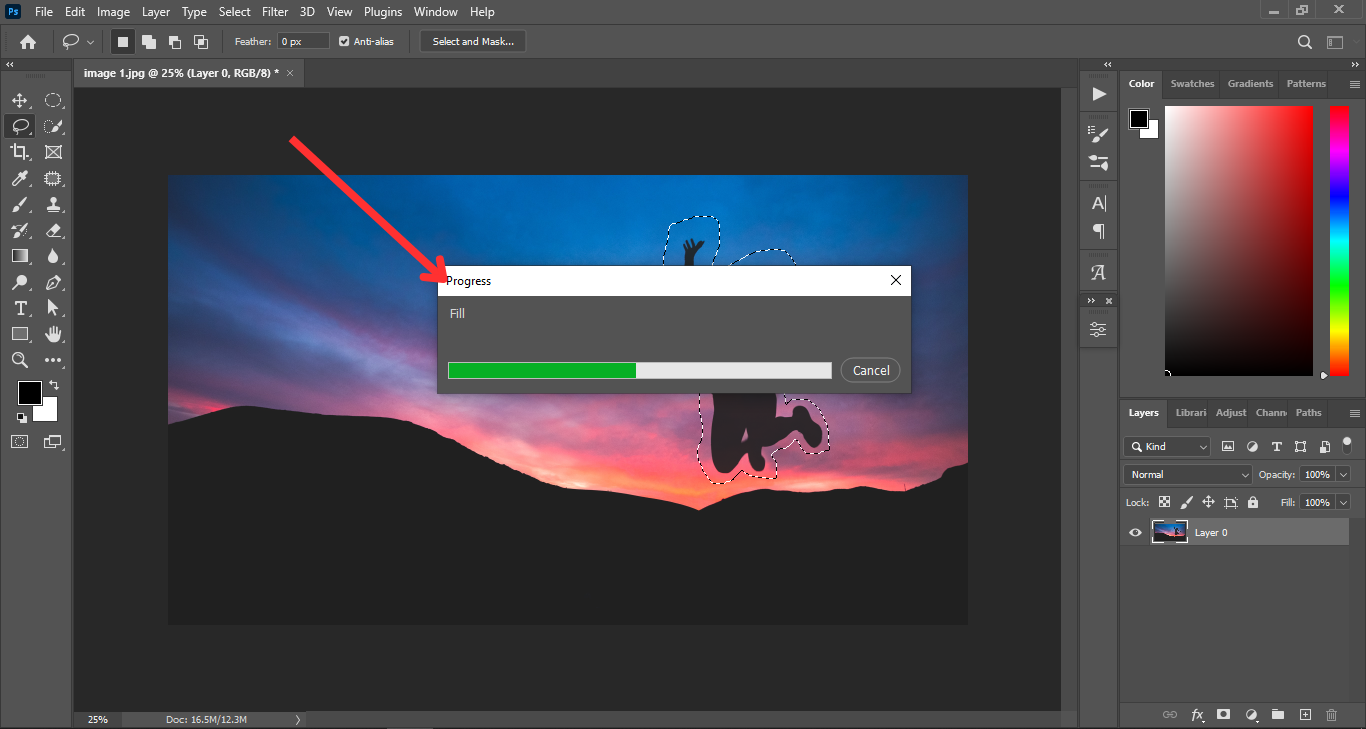
It will take some seconds to remove the unwanted objects from your image file. Wait for a moment! See the below image to understand the progress of this task.
Step#4: See the Changed Area Carefully
Once you use the Content-Aware fill, your circled thing will go away quickly. But you need to check if the area looks weird or not. If it does, you need to fix it.
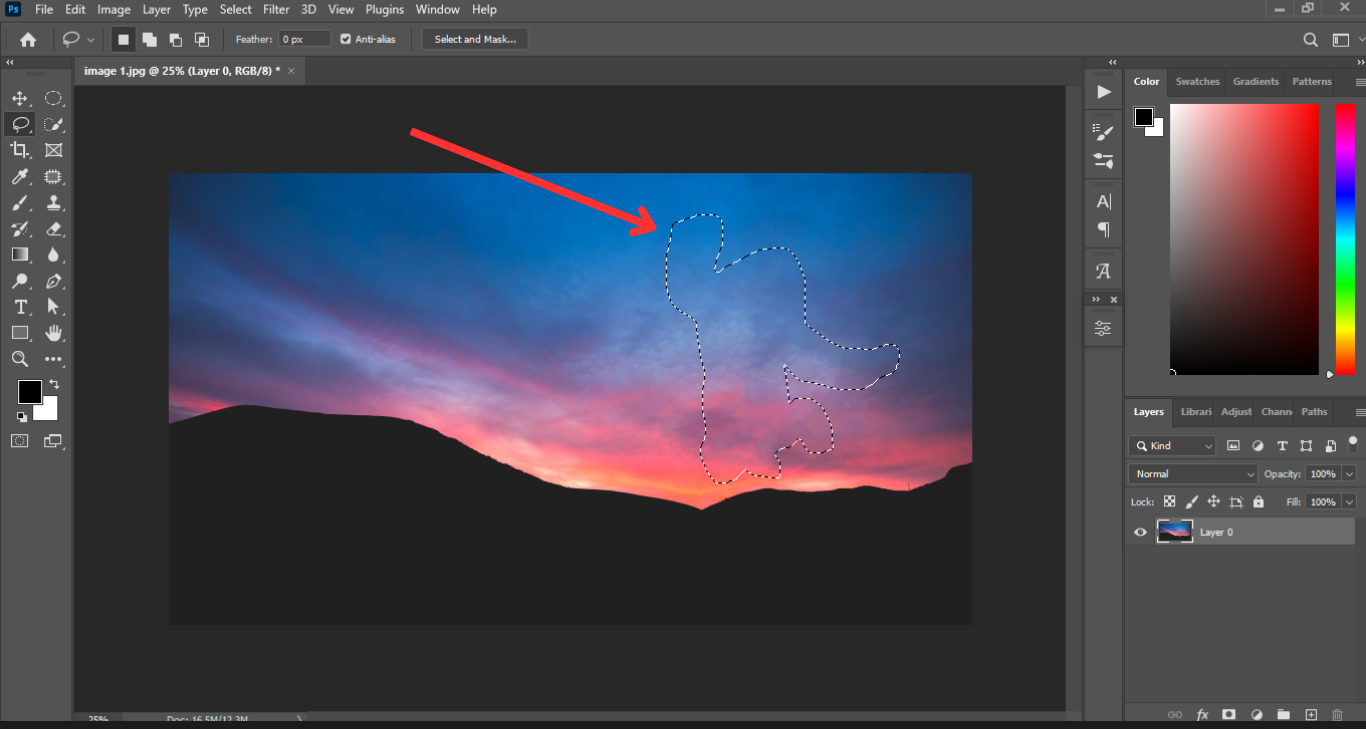
Step#5: Do Some Required Adjustments and Fix the Problems
You can fix any problems that happen after removing the unwanted objects from your image. Pick the “Lasso tool” again like before.
By using the “Lasso tool,” draw a circle around the problem area. Then use the “Content-Aware” fill and opacity level (100%) as before. Look at the following images:

Step#6: Save Your Final Output
The last step is to save your work. After completing all the tasks flawlessly, you can finalize your work by saving your file in the folder of your choice. You can either click on save or use the shortcut CTRL+S. Make sure that you save the photo as .PSD format so that you can edit it later if needed.
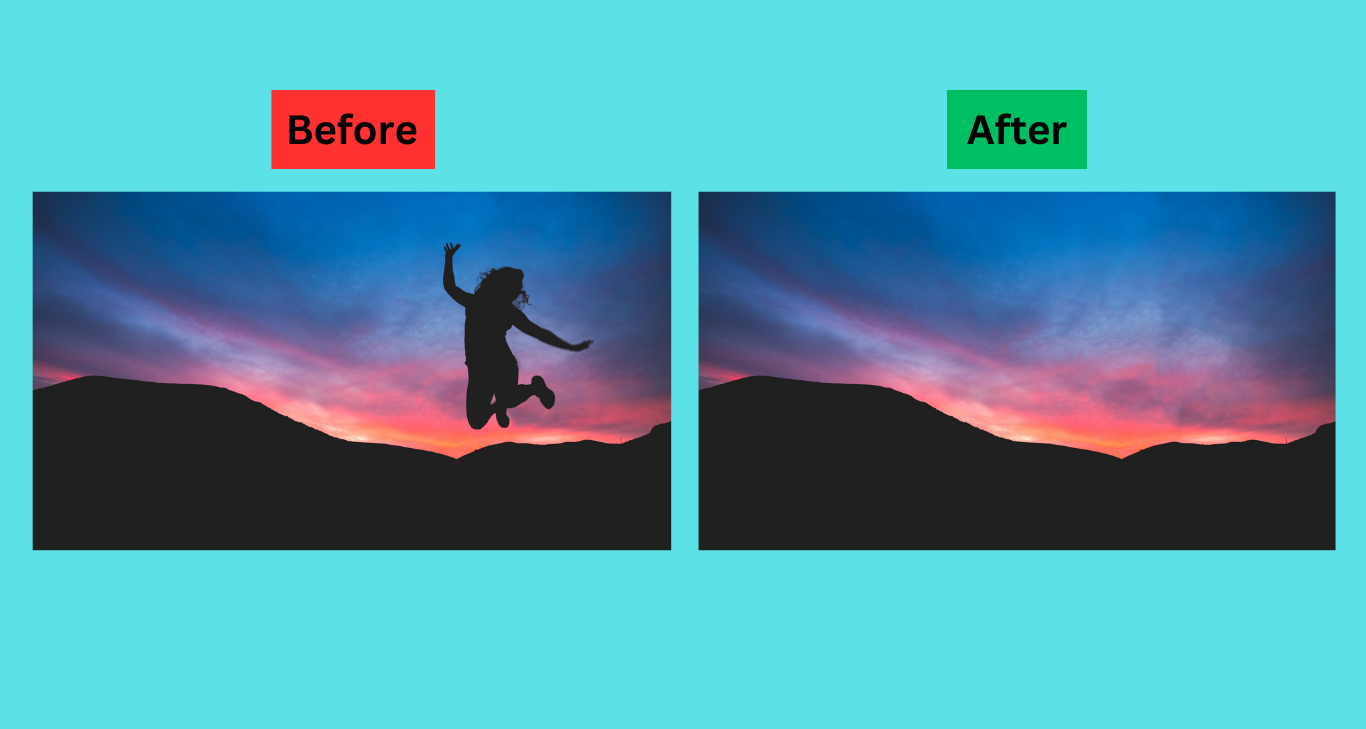
Congrats! You have successfully removed the unwanted objects from your images. Now, it looks so great! And that’s your final image given below:

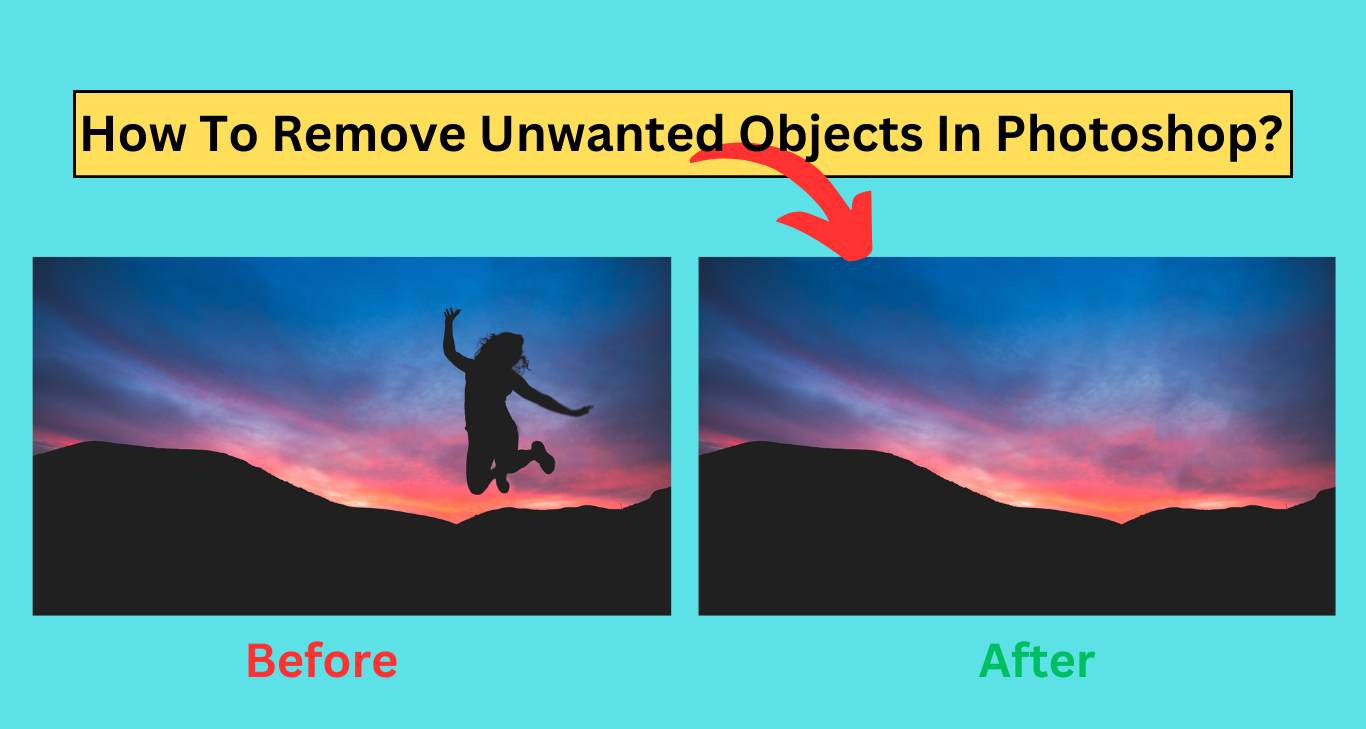
Also, you can compare the before and after versions of your work and see the improvement. Look at a glance in the following images:
Final Words About How to Remove Unwanted Objects in Photoshop CC:
In a nutshell, Adobe Photoshop offers a variety of tools that can help you remove unwanted objects from your images. Whether it’s a blemish, a watermark, or a stray object, you can make it disappear with a few clicks and adjustments.
In this article, we have already described a step-by-step guideline on how to remove unwanted objects in Photoshop CC. By following these steps carefully, you can achieve amazing results on your own without any delay.
However, if you still need some professional assistance, we are here for you. At CMA (Clipping Mask Asia), we have a team of photo editing experts who have a good knowledge of how to remove unwanted objects in Photoshop and can handle any kind of unwanted object removal task and deliver high-quality images that will meet all of your expectations.
So, why not give us a try and see for yourself? Contact us today and get a free quote for your project. You won’t regret it!
If you want to read more latest Photoshop tutorials, photography blogs, etc., please visit our blog page.
Thanks for reading!


