Ever looked at a photo and thought, “This would be perfect if only that shirt were neon green? You’re not alone! Changing the color of an object in Photoshop can transform an ordinary image into a stunning masterpiece. Whether it’s for a quirky social media post or a professional project, mastering this skill can add a splash of creativity to any endeavor.
How To Change Color Of Object In Photoshop
Color adjustments play a crucial role in refining images within Photoshop. Users can alter hues, saturation, and brightness to enhance overall aesthetics.
Importance of Color Adjustment
Color adjustment impacts visual storytelling. Colors evoke emotions and attract attention. Bright colors convey energy, while muted shades create a sense of calm. Adjusting colors can improve focus on key subjects in an image. Additionally, consistent color schemes establish brand identity. Correct color representation influences audience perception, making adjustments vital for marketing materials.
Common Scenarios for Color Changes
Common scenarios for color changes include product photography, portrait editing, and graphic design. Product photography benefits from accurate color representation to appeal to consumers. Portrait editing often requires skin tone adjustments to ensure natural appearance. Graphic design projects frequently utilize color changes to match branding elements. Event photos might need color corrections to maintain consistency across various shots. Each scenario presents unique challenges that color adjustments can effectively address.
Steps to Change Color of Object in Photoshop
Changing the color of an object in Photoshop requires specific steps to achieve desired results. The following outlines the process clearly.
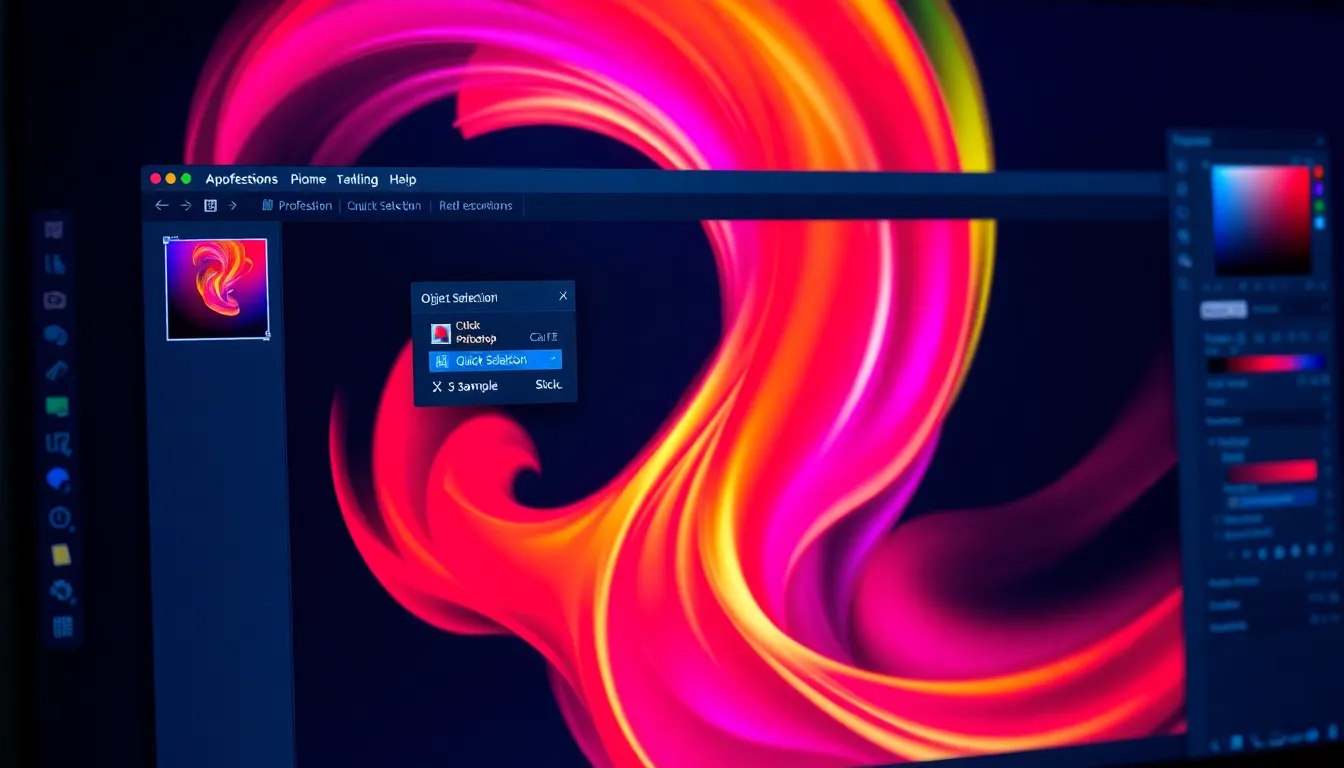
Selecting the Object
Selecting the right object marks the first step in color adjustment. Use the Quick Selection Tool for easy selection of the object’s edges. Apply the Lasso Tool if more precision is necessary. For complex shapes, the Pen Tool allows for detailed selections. After selecting, create a new layer via copy to isolate the object, ensuring that changes affect only it. This layer becomes crucial in the following adjustment steps.
Using Adjustment Layers
Adjustment Layers provide flexibility and non-destructive editing capabilities. Access these layers via the Layers panel and select “Hue/Saturation”. Adjust the sliders to change hue, saturation, or lightness according to needs. Specific changes can target the selection by clipping the adjustment layer to the new layer created previously. This method preserves the original layer, making it easy to revisit adjustments. Experiment with multiple adjustment layers for intricate color modifications.
Applying Color Replacement Tools
Color Replacement Tools facilitate straightforward color changes. Select the Color Replacement Brush from the toolbar and choose the desired color. Adjust the brush size for precision, especially around edges. Paint directly over the area needing color change. The tool replaces existing colors with the new selection while keeping texture intact. Fine-tune the sampling settings to improve accuracy. This technique works well for quick, efficient color changes in various projects.
Techniques for Different Effects
Color modification techniques in Photoshop offer a range of visual effects. Each method serves specific creative goals while enhancing images.
Changing to a Solid Color
A solid color change achieves a bold, uniform look. Create a new layer and select the desired area of the object. With the Paint Bucket Tool, fill the selection with the chosen color. Adjustment layers can further refine the saturation or brightness. This technique works well for graphic elements and product images, ensuring the object stands out distinctly.
Creating a Gradient Effect
Gradient effects provide depth and dimension. Begin by creating a new layer above the object. Select the Gradient Tool and choose a gradient preset or customize a new one. Apply the gradient to the selected area, adjusting the angle to achieve the desired flow. This method creates a smooth transition between colors and can emulate natural light, adding realism to the composition.
Using Image Adjustments for Fine-Tuning
Image adjustments allow for precise color control. Utilize tools such as Hue/Saturation and Color Balance for specific tweaks. Begin by selecting the object layer, then apply Adjustment Layers to maintain editability. Fine-tune hue shifts, increase saturation, or modify lightness to achieve a polished final look. These adjustments enhance overall image quality and ensure colors align with the desired emotional tone.
Finalizing Your Edits
Finalizing edits in Photoshop ensures completed color changes look professional and polished. It involves saving projects correctly and comparing versions to confirm satisfaction with the outcome.
Saving Your Work
Saving changes frequently prevents lost edits. Use the ‘Save As’ function to store a new version of your file, maintaining the original in case revisions are needed later. Choose formats like PSD for preserving layers or JPEG for a more compact file to share easily. Consider backing up your work on cloud storage for added security. Always check the file’s final dimensions and quality before sharing or printing.
Comparing Before and After
Comparing the original and edited images highlights the impact of color changes. Turn on and off the visibility of the adjustment layers to view the transformation directly. Utilize the ‘History’ panel to track adjustments made and revert if necessary. It’s helpful to zoom in and out for a broader perspective, assessing how changes affect the image as a whole. This practice ensures the final appearance aligns with the intended vision.
Conclusion
Mastering the art of changing colors in Photoshop opens up a world of creative possibilities. By utilizing the right tools and techniques, anyone can enhance their images and make them more visually striking. Whether for personal projects or professional endeavors, effective color adjustments can transform an ordinary image into something extraordinary.
The ability to manipulate hues and saturation not only improves aesthetic appeal but also strengthens visual storytelling. With careful editing and attention to detail, users can achieve polished results that resonate with their audience. Embracing these skills ensures that every project reflects the desired emotional tone and engages viewers effectively.